
Today we are creating watercolor swatch cards! This is a really easy & simple exercise. I would highly recommend doing this once you move into using professional-grade paints. There are lots of ways to store swatch cards. You can choose to use a card catalog with clear sheet protectors and binder. I will be punching holes in my cards to keep them all on a key ring.
For this exercise, you will need:
- watercolor paints (tubes or pans)
- high quality watercolor paper (I recommend using the kind you’ll use most often)
- a ruler
- an x-acto knife or something similar
- a waterproof pen (I am using a sharpie)
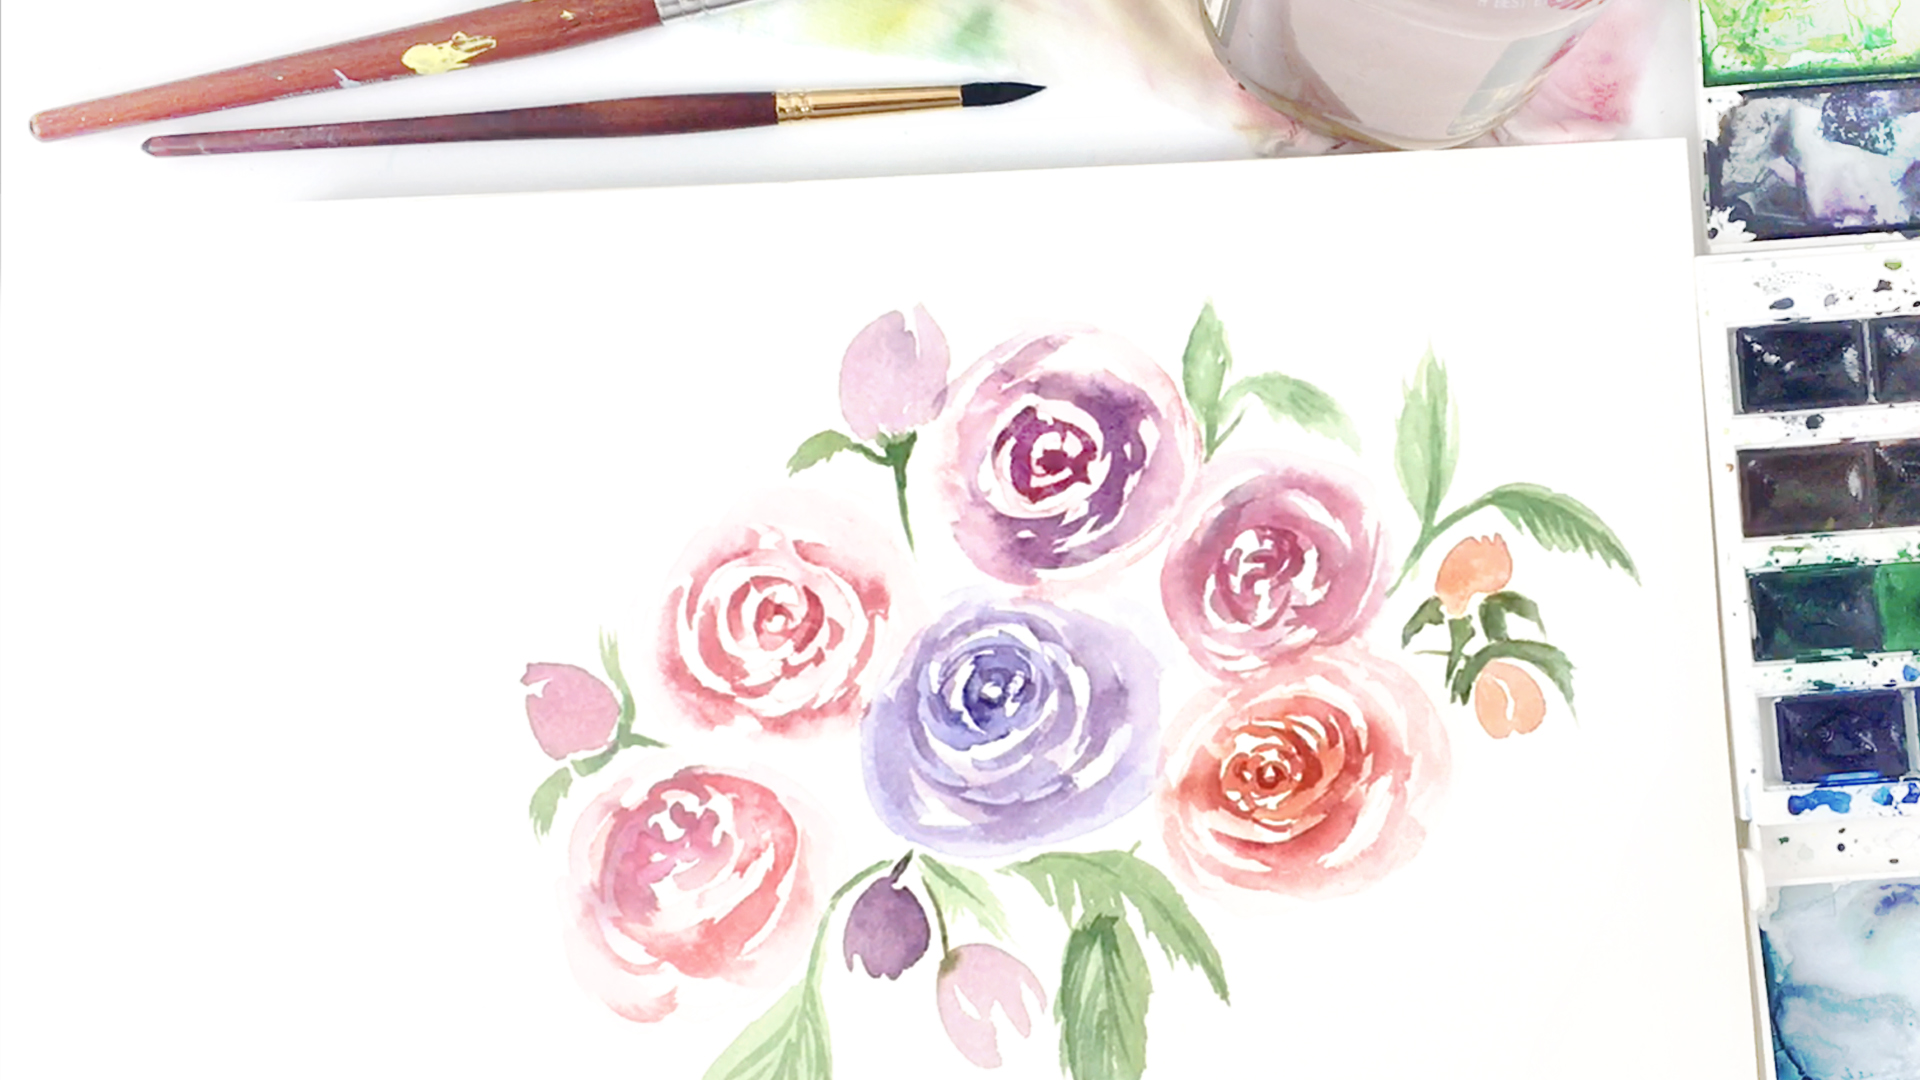
- two flat brushes (I am using one watercolor & one acrylic brush)
- paper towels
- water jars for rinsing
- mixing tray for paints
- single hole punch (optional)
- key ring (optional)
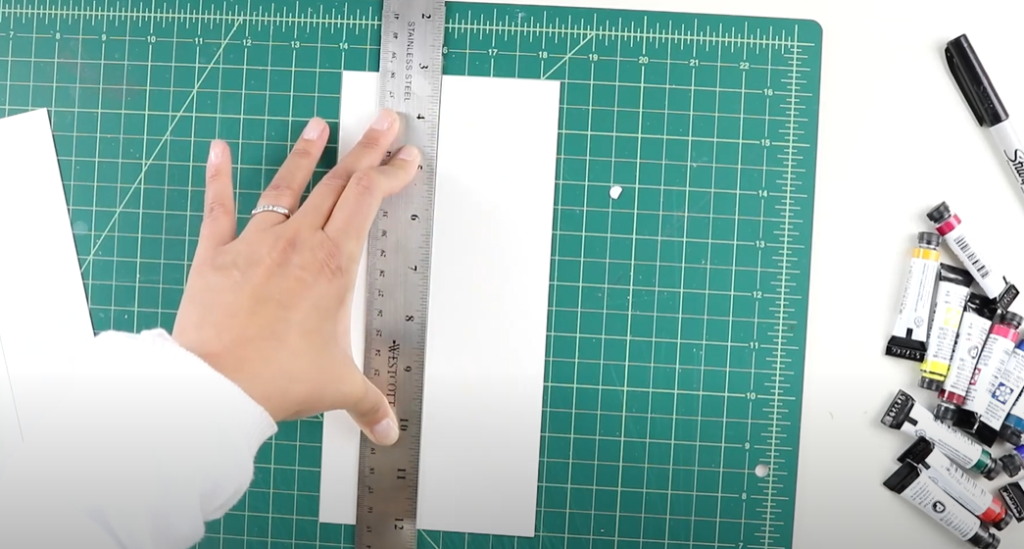
First we are going to make our cards. Because my paper is 9×12, I am making my cards roughly 2×3. I am using a cutting mat with pre-marked lines, but if you don’t have one just use your ruler & pencil to mark your dimensions.
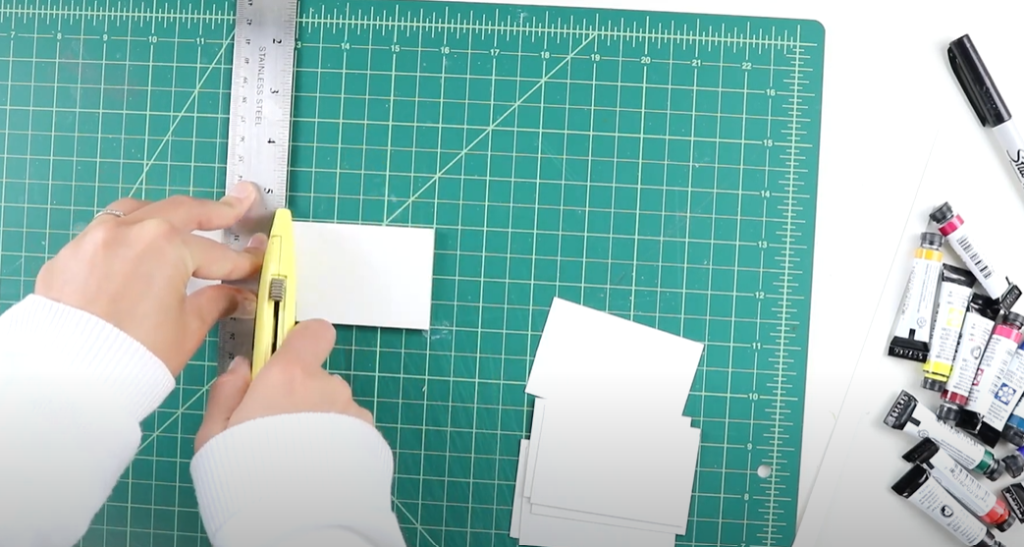
Some brands of paper have a front and back side, so you’ll want to be sure to keep track of that in order to keep all the cards facing in the same direction. To save some time I’m stacking my cards and making the second cut all at once. After the second cut I stacked them all together and made sure they were all even, cutting off any excess with my x-acto knife.
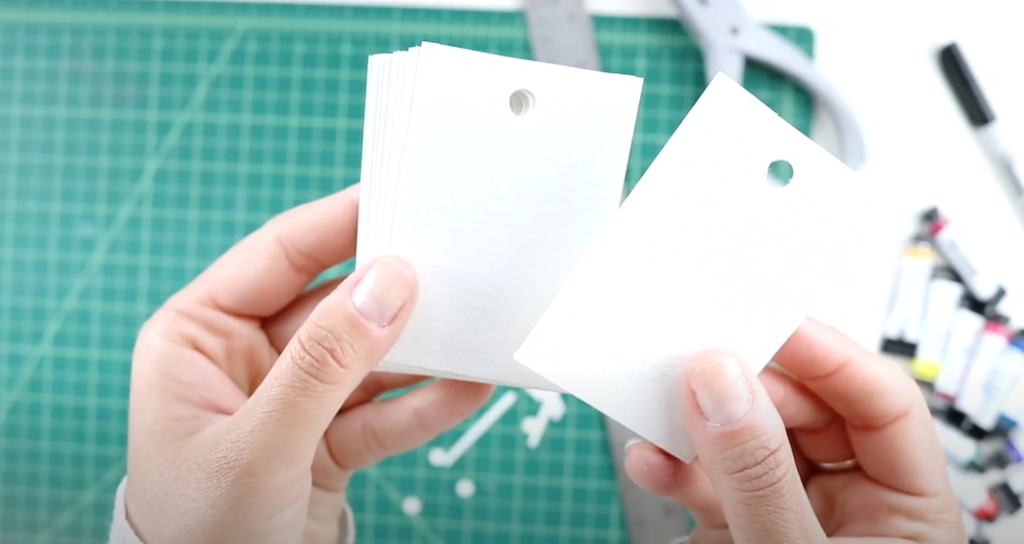
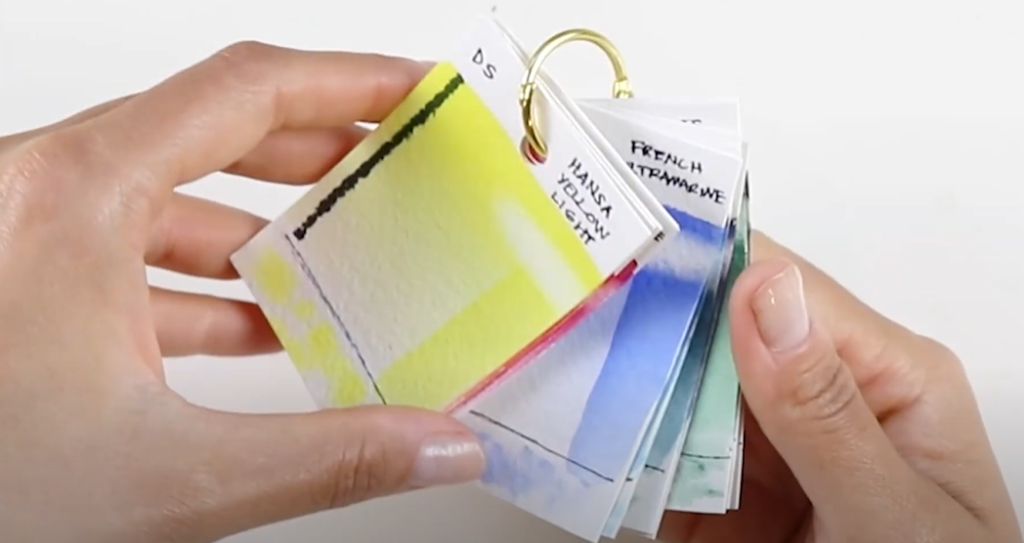
Next I am taking my single hole punch & making one hole at the top of each card before I start painting. I made extra cards for any future paints I want to make swatch cards for. Today I am just using 12 from the Daniel Smith line.
Although I use round brushes most often, I’ll be using a flat brush for this exercise. I want to make even washes, and this shape makes it easier to do so. You’ll also want to ensure your mixing tray is clean before starting to ensure clean colors!
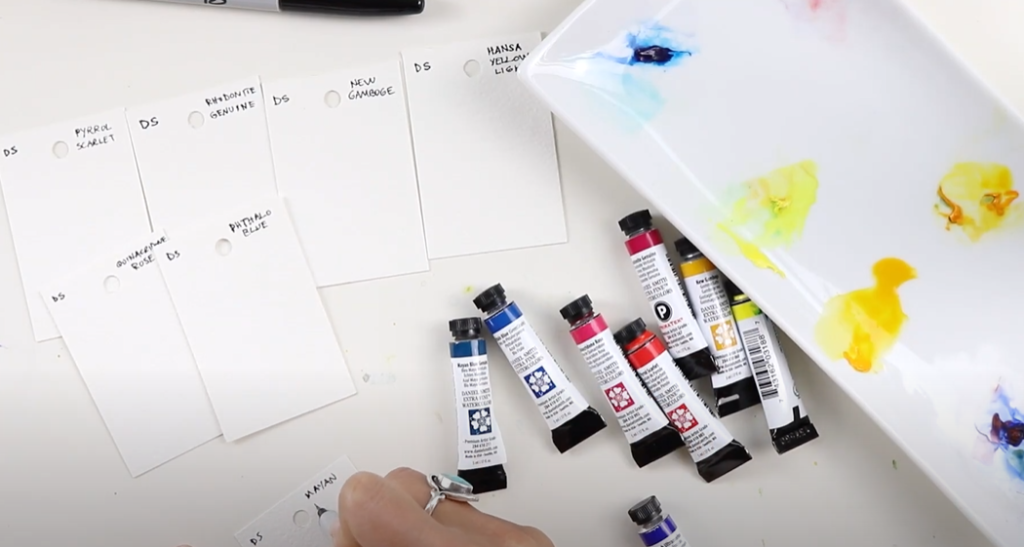
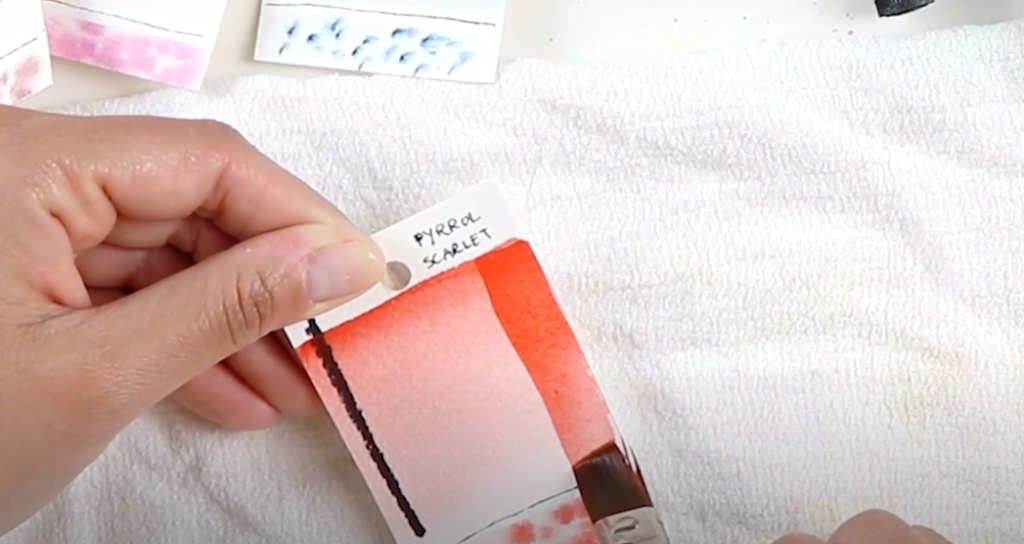
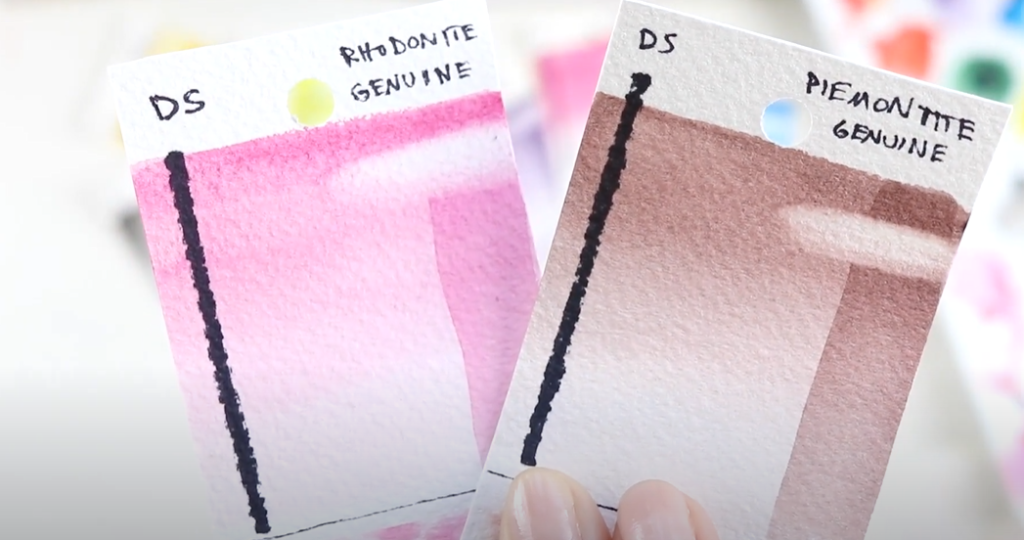
Before we do any painting, I am labelling my cards using a black sharpie pen. I find it easiest to do all the labelling at once. I am putting the brand name (DS, short for Daniel Smith) and the color name. You can also write in each of the pigments, which are usually listed on the back of tube paints or somewhere on the label.
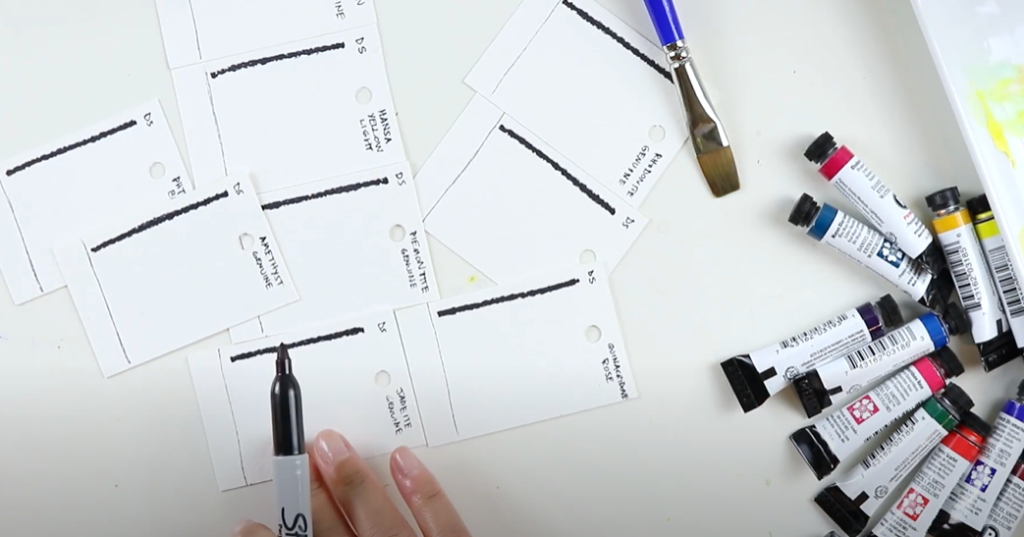
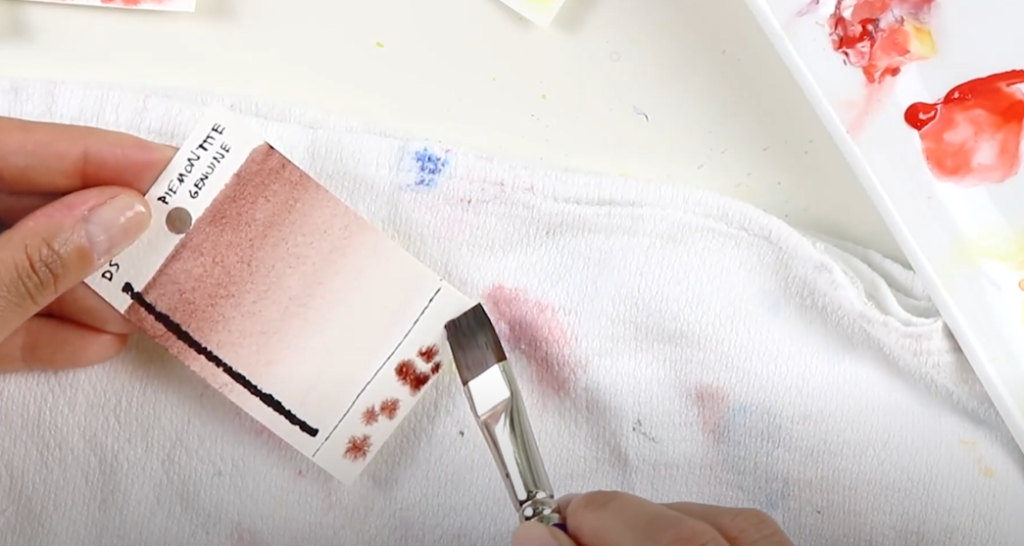
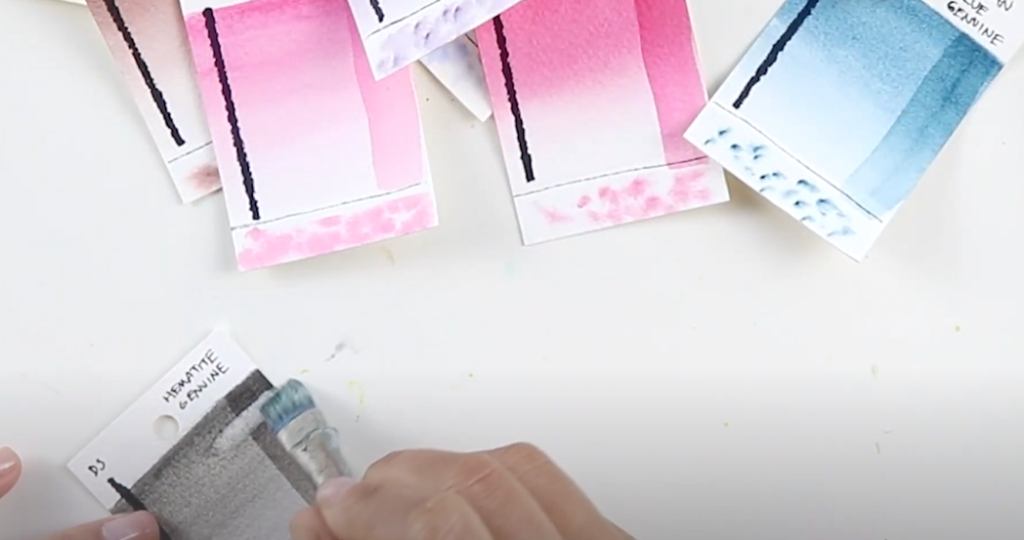
I am also going to be doing a small wet on wet test along the bottom of each card. Using my sharpie pen, I am marking about a half inch space for this. After you do this, you’ll also want to make a thicker black line on the side of each card. I did this will a regular sharpie marker. This ink will show us the opaqueness test; if your paint covers it up, it is opaque. If the paint is more transparent, you’ll see the line more clearly.
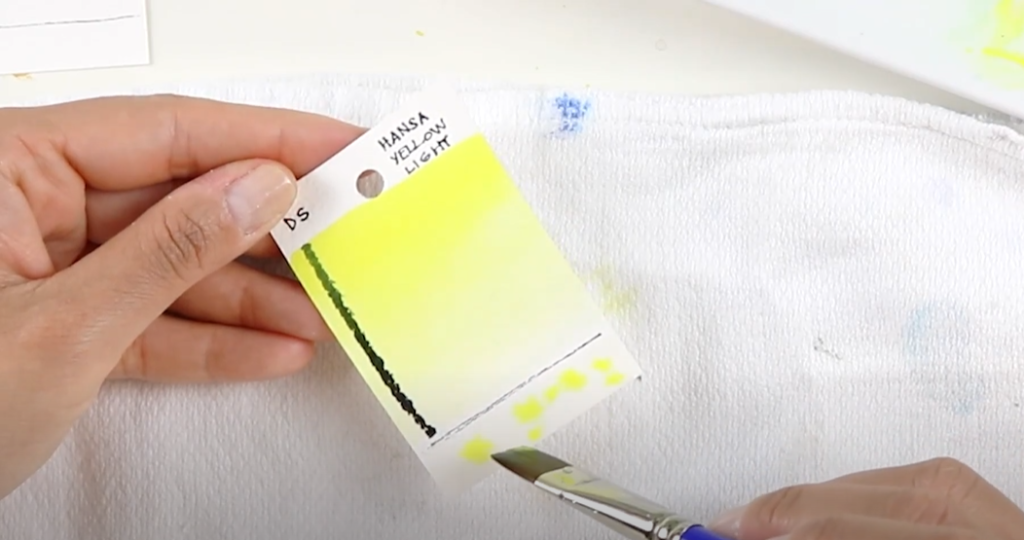
Now it’s time to start painting! I am first going in with a stripe of the strongest variation of the color. Then I am rinsing my brush and pulling down the color as I move down the card so it’s mostly just water towards the bottom. I am adding a clean water stripe at the very bottom for the wet on wet test. Then I’ll drop some color onto that wet spot. As it dries you’ll be able to see how that color disperses.
Continue the process for each of your colors. If you’d like additional guidance on making these cards, I have a free printable guide & template for you to use as a reference! There is a template for your swatch cards as well as a cheat sheet on how to make them.
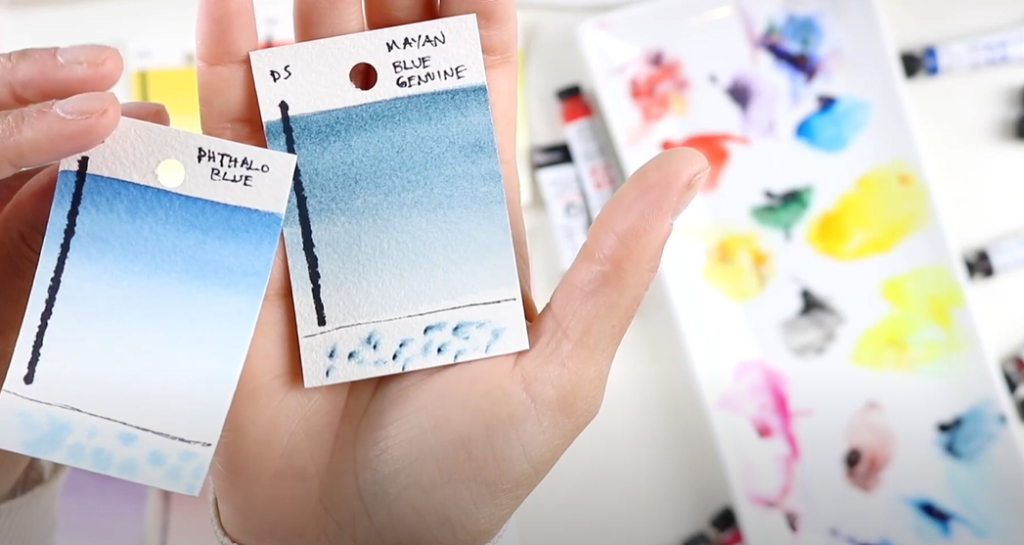
Once you’re done, let them dry completely. As it dries you’ll be able to observe where some paints are smooth and others are granulating. Daniel Smith paints are known for granulated paints, which is something I personally really love! You’ll also be able to see your wet on wet sections, which is not a perfect science, but it does give you a good idea of how your paint will behave.
Once your cards are dry, we’re going to do a glaze over each card. To do this I am putting in one stripe along the right hand side to show what it would look like layering these paints. The translucent paints will be easy to see, and the opaque ones should be more even.

After that layer has dried, you’ll be able to clearly see that glaze right on top. This is another great test to do in order to see how your paints behave. You’ll notice how different paints can look when they are wet or dry!
Next I am taking an acrylic flat brush, which has more stiff bristles, and is good to use for our lifting test. I am going to be wetting this brush a little and making a horizontal stripe, trying to remove some of the paint. Then using a paper towel, I’ll dab up any color that comes up. Each of these paints will be a little bit different. If they’re staining, they’re going to be a little bit harder to lift. If not, you’ll see it’ll be pretty easy to erase that color. This is great way to see that if you make a mistake, you can always remove some paint!

You can see that some paint comes off pretty clean, while others still show a little staining on the background. This is good to know if you are going to be using certain paints and wanted to be more flexible with your colors.
The very last step is storing these cards! As mentioned earlier, you can put them in sheet protectors in a binder, use string to tie them together & hang in your studio, or you can use a key ring. I keep it near where I paint so it’s easily accessible!
I hope this exercise was a fun & simple way for you to get to know your paint better! I recommend doing this when you buy new paints, because as your collection grows, you may or may not the properties of each of your paints. It’s always nice to have a reference on hand whenever you need it.
Don’t forget to download my FREE printable guide & template for you to use as a reference!


Making Watercolor Swatch Cards
VIEW THE COMMENTS