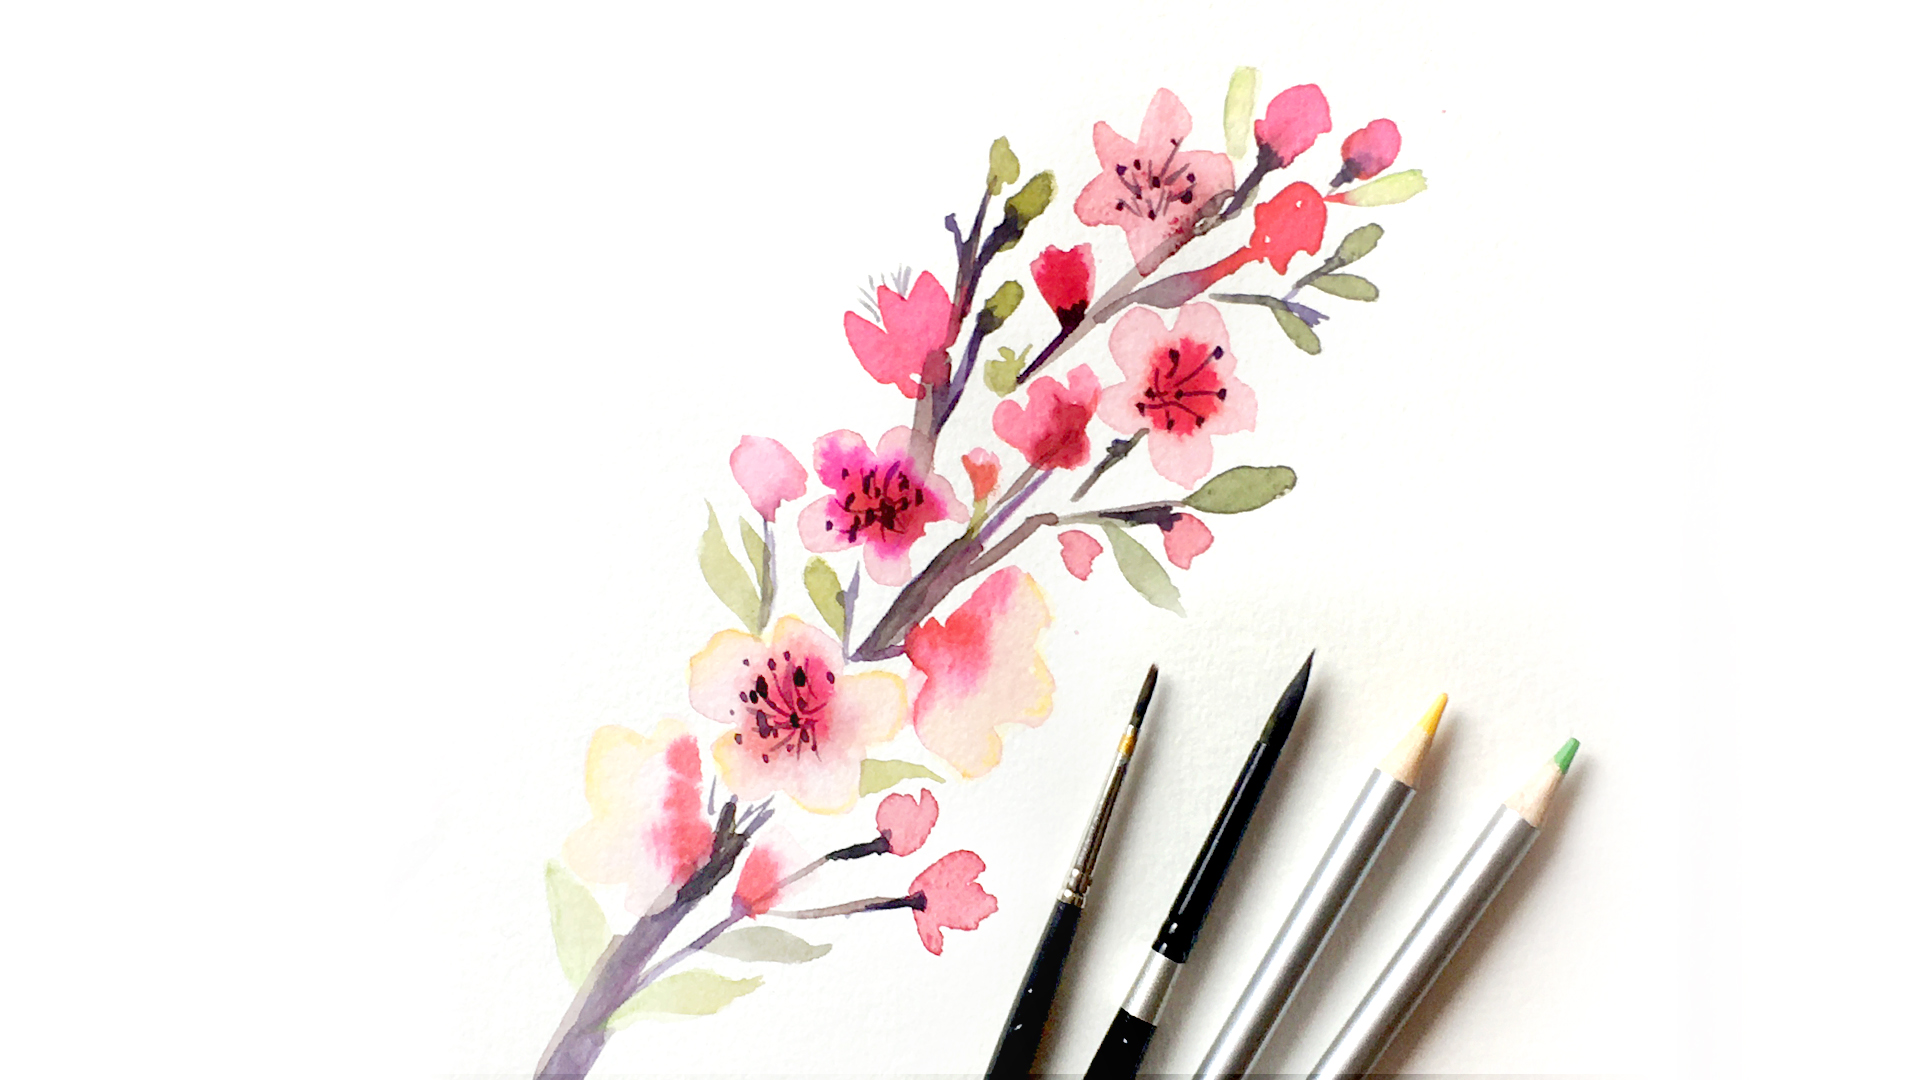
Today we are using watercolor pencils and paint to create cherry blossoms! This is a wonderful tutorial to help you practice adding more detail and color to your watercolor compositions.
In this tutorial we will practice:
- painting using reference images
- bleeding & layering watercolor
- using watercolor pencils
I love painting cherry blossoms because the flowers themselves are quite simple & come together quickly. It’s also a great way to practice that “wet on wet” technique which you can use so many different ways when you’re painting!
For this tutorial, you’ll need:
- pointed round brush (medium and large)
- detail brush
- watercolor paper
- watercolor paint
- watercolor pencils
First I will show you a demonstration of how to create the cherry blossom flower, and then we will use it to create a beautiful branch with flowers, buds, and greenery. Grab your supplies and come paint with me!
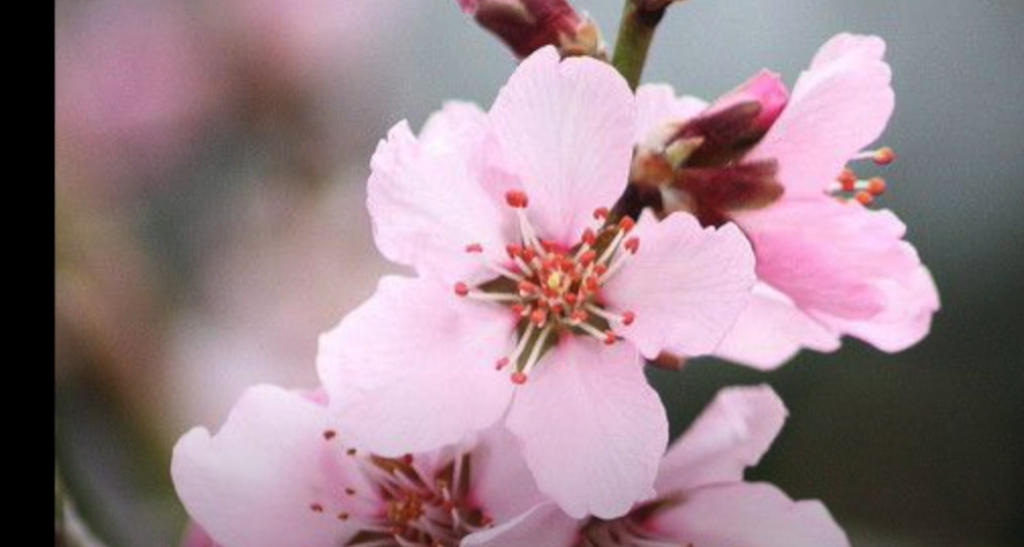
Let’s take a look at the reference photo first. You can see each flower has five petals and they grow in clusters. Their color usually varies from a light pink to dark pink. They also have round little buds. Cherry blossoms also grow closely along a branch.
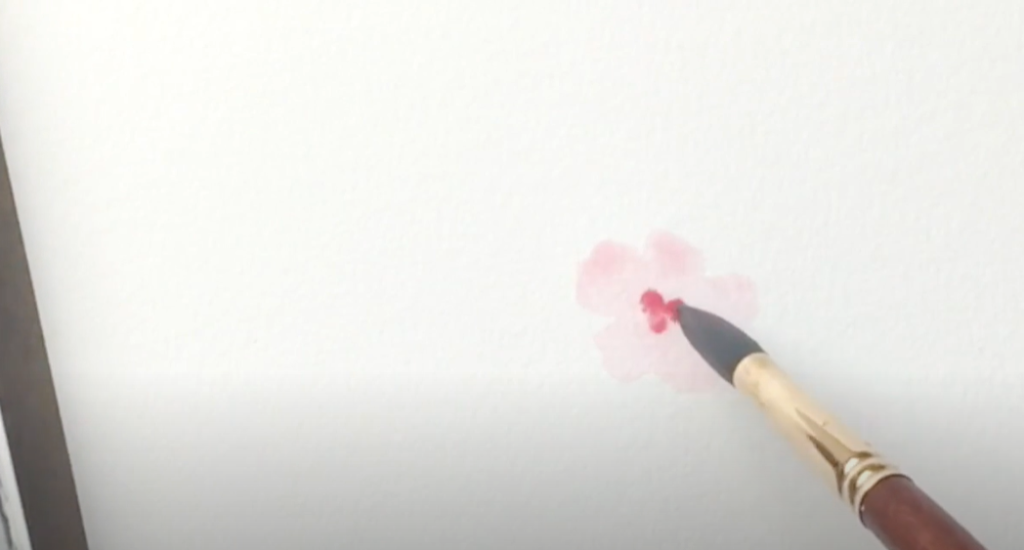
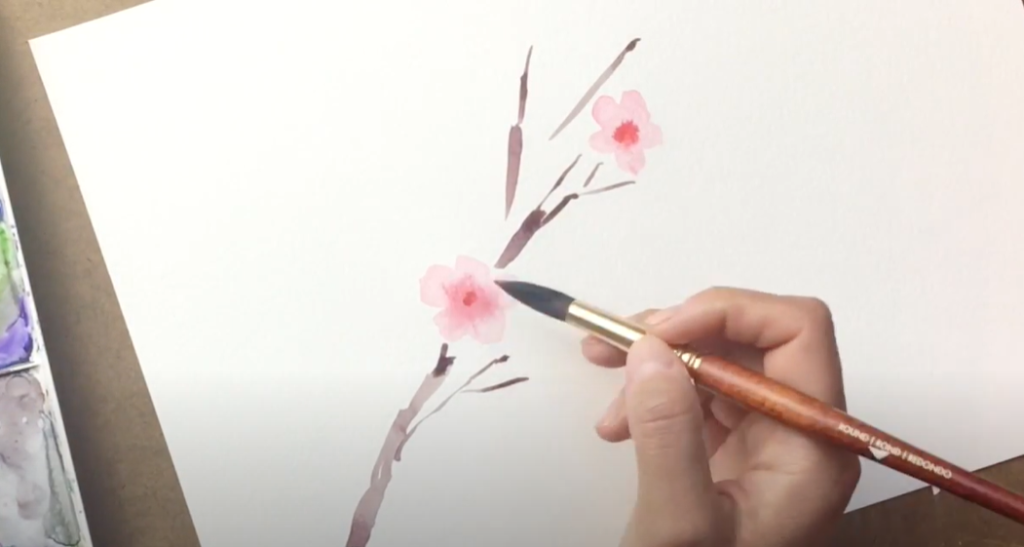
Let’s look at the blossom close up first! Starting with some light pink paint, I’m putting in five petals for one cherry blossom. I’m keeping it really translucent to start. Then while it’s still wet, I’m dropping in a darker pink right into the center, and letting that fan out & bleed on its own.
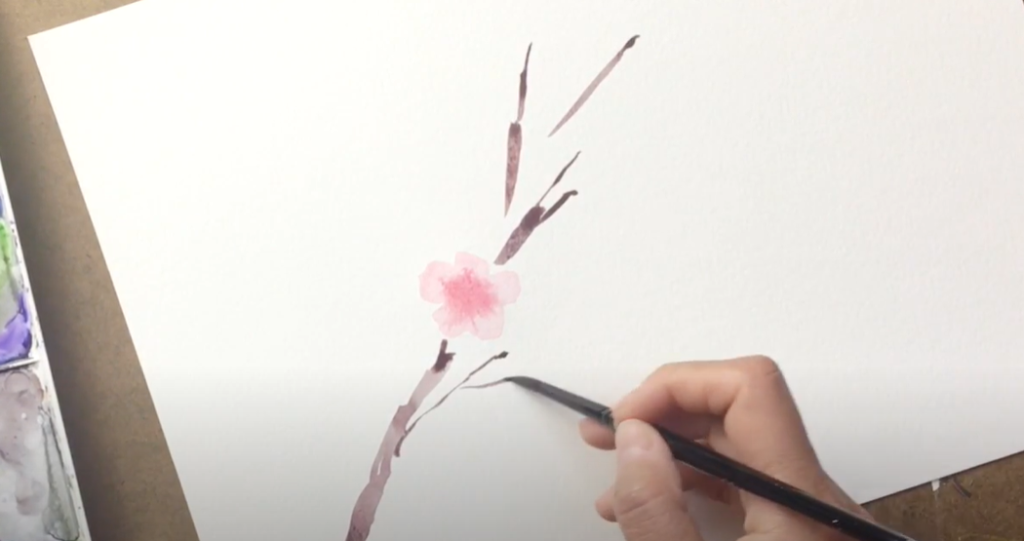
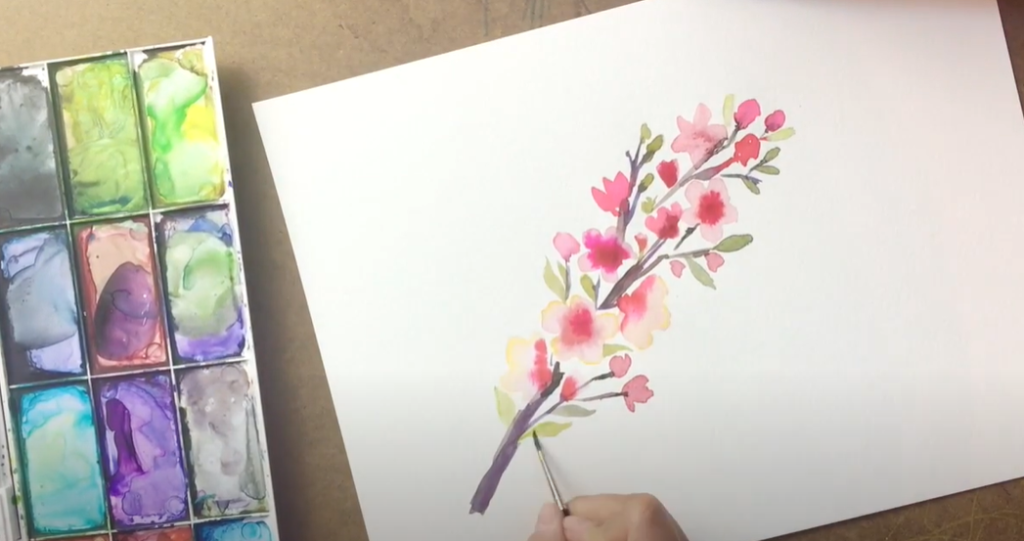
Next I am moving on to creating a branch. Using some dark brown paint and a smaller brush, I’m making some thin and thick lines that go “behind” the flower. Make sure to leave space to add in the rest of the cherry blossoms!
Going back in with my larger brush, I am adding in some more blossoms, using the same technique as the first one. Add in five translucent petals. If you get too much paint in your blossom, you can rinse your brush and pick up some of that extra water to lighten it up. Then drop in your darker pink in the center.
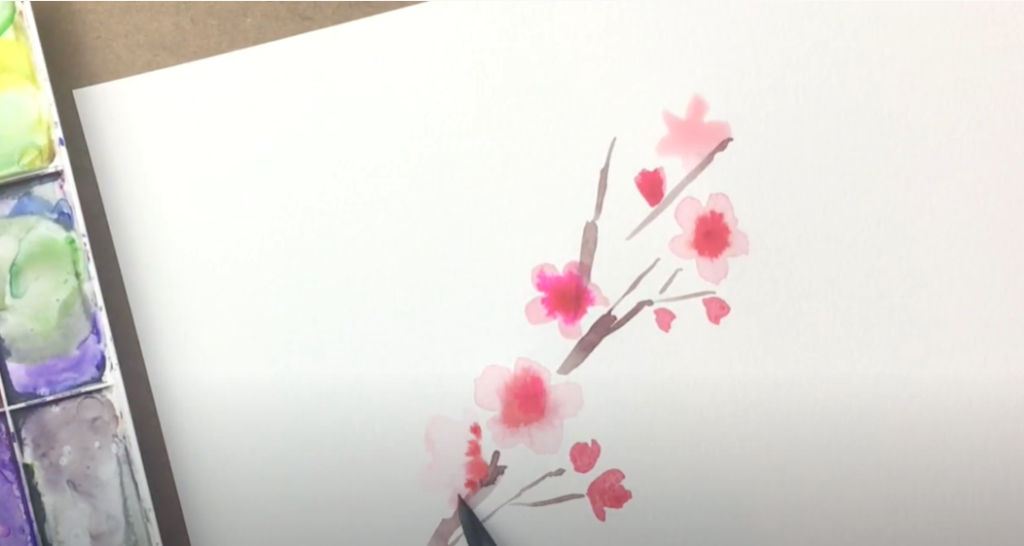
Continuing to add to the branch, I’m putting in some little buds and smaller flowers. I am working my way up the branch, making sure to add a few lighter blossoms and a few more saturated with color. This gives a really nice contrast.
Cherry blossoms are pretty quick to paint, because they’re quite a simple flower. They’re a lot of fun because you can use that wet on wet technique. I love watching the color blends happen when I drop in the darker colors!
Next I am going to use a purple-brown color that is darker than my original branch color. I am using it to go over a few areas on the branch. In the spots where the buds connect to the flower, I’m letting it pool up a little bit so they are darker spots to show the new growth on that part of the branch.
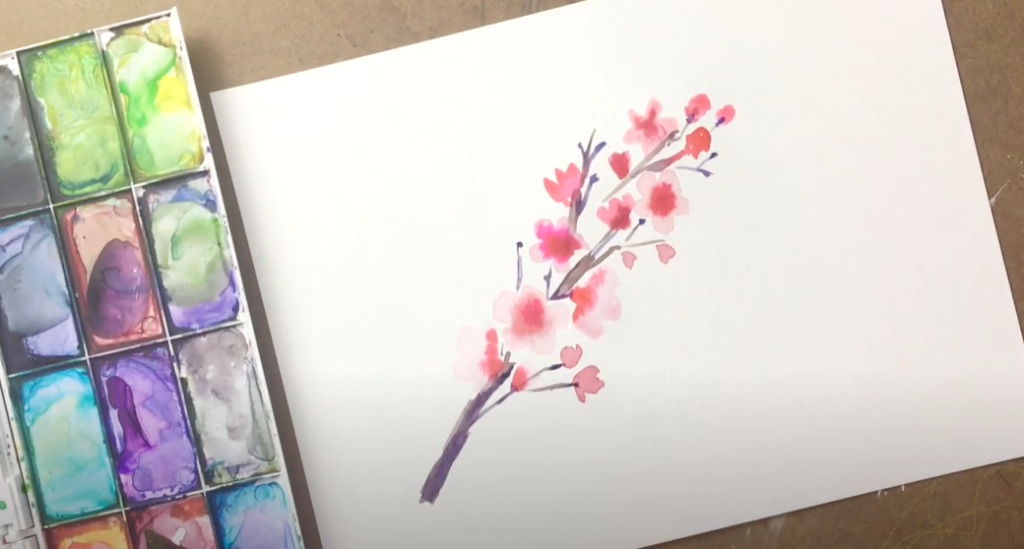
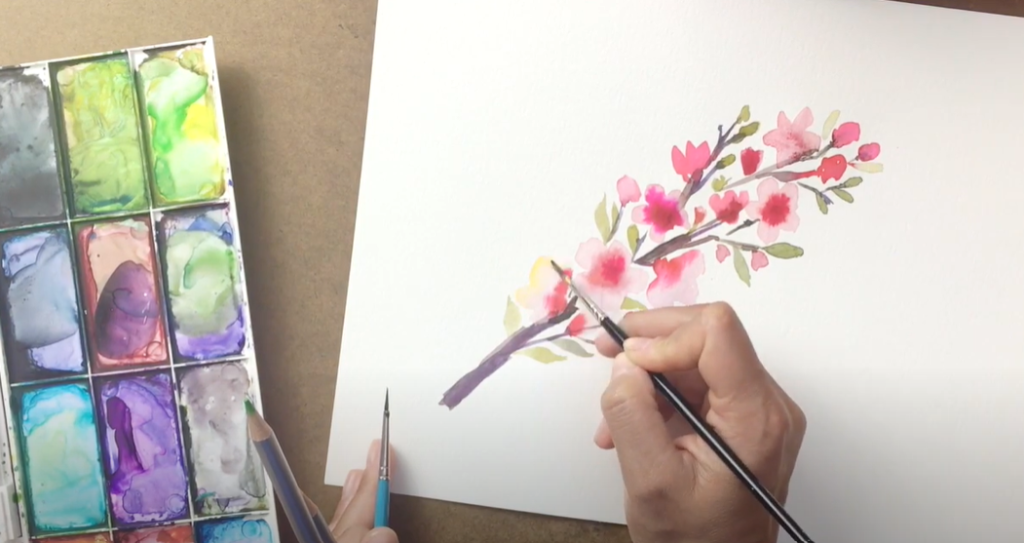
Next I mixed up a little green so we can start putting in some small leaves. I used a yellow-green with a touch of purple in it to tone it down. Once all the leaves are in, we’ll let this first layer dry completely, and then come back with our watercolor pencils. This is just a fun way to add a little more warmth and color into our final piece!
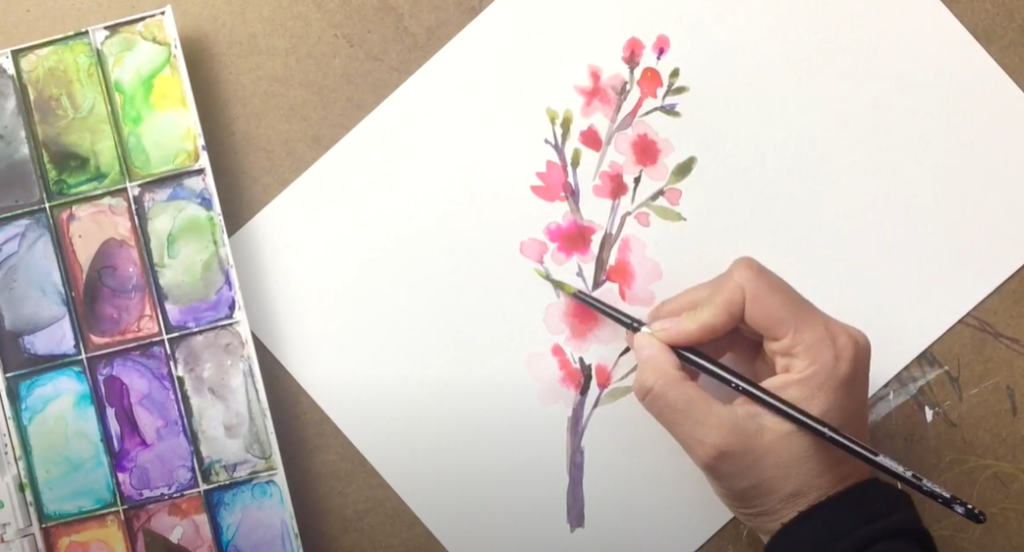
I am using a yellow and green watercolor pencil, along with a detail brush. There are a lot of ways to do this, but what I like to do is first wet the area with my detail brush, and then lightly go in with the watercolor pencil. Then go back in with the detail brush with just clean water, and then blend out some of those edges.
I find that when you wet the area with water first, then it’s a lot easier to control how much of the watercolor pencil you actually want on there. If you did it dry, I think it would be harder to take away that color. I am adding in some yellow to some of the blossom petals, and some green to some of the leaves. The green is very subtle; I just want to add a few edges.
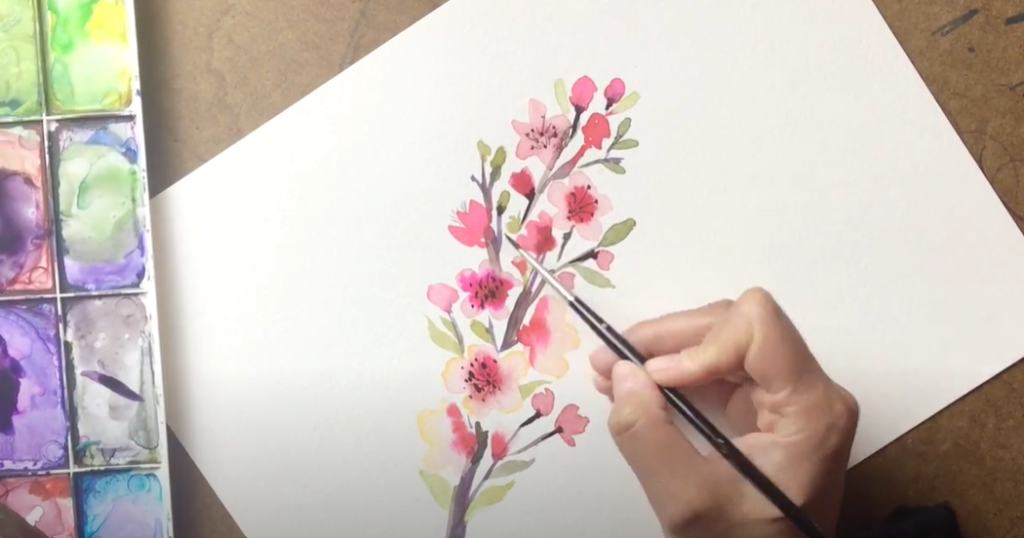
After that has fully dried, we can go in and add the centers to the flowers! This is just a few thin lines and some dots in the center of our blossoms. I am also going in and darkening up a few of the bud areas, right where they connect to the stem.
I hope you enjoyed painting along with me! If you recreate this, please tag me on Instagram and/or Facebook so I can see your work.

Want even more watercolor tutorials?
Join my FREE Watercolor Florals Challenge! In this challenge, you’ll receive new tutorials for each season, and get access to our private Facebook community group. There you can connect with other creatives, ask questions, and get feedback on your work!


Cherry Blossoms Watercolor Tutorial
VIEW THE COMMENTS