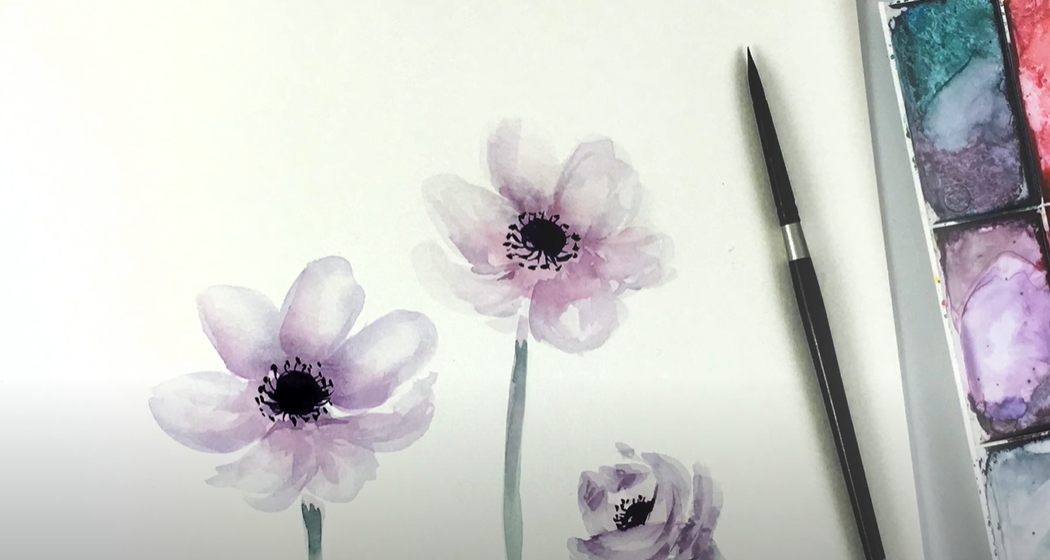
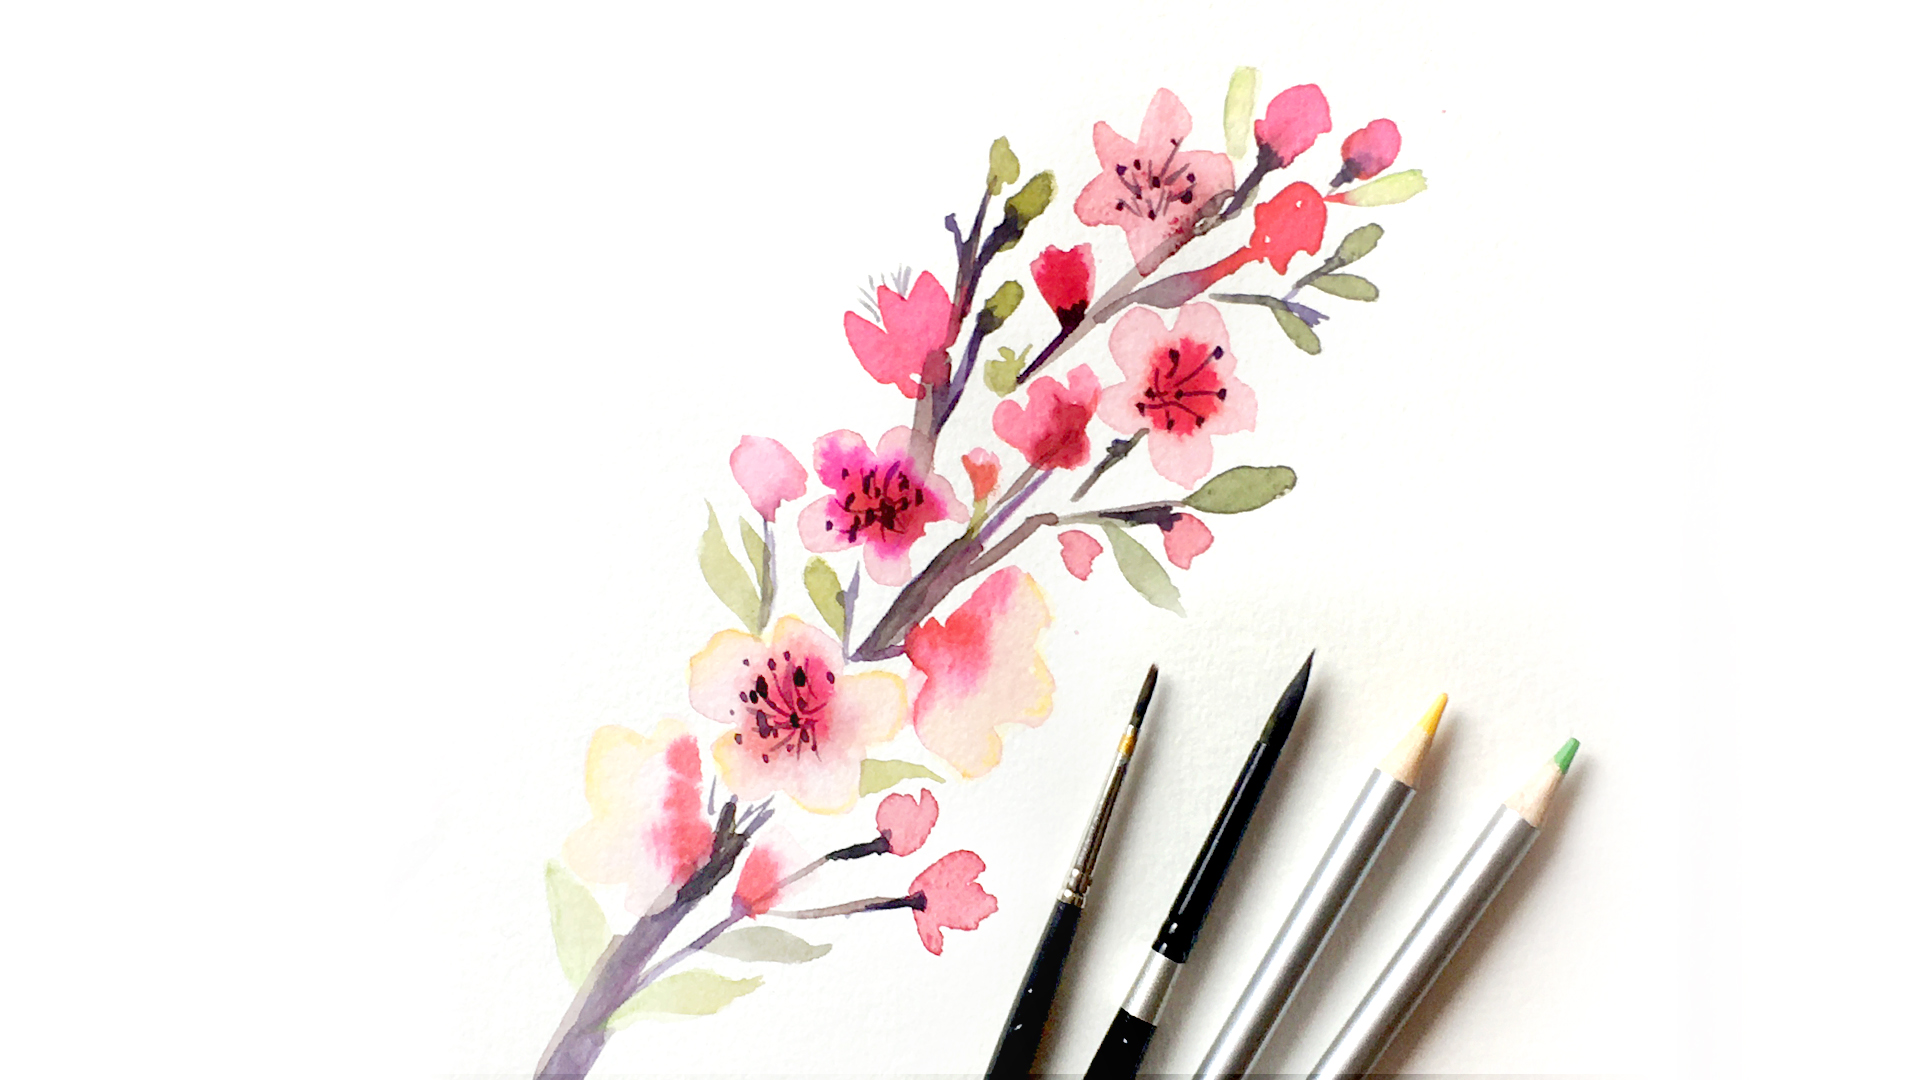
This tutorial is all about painting anemones! This is a loose style of painting, and perfect for beginners.
In this tutorial we will practice:
- blotting technique to get translucent washes
- wet-on-wet bleeding
- glazing technique to build color
You may find it helpful to use a reference image. For additional anemone reference images, take a look at my Spring Watercolor Pinterest board! There you’ll find tons of images for various flowers. Paint along and practice with me as you learn simple techniques that you can apply to any watercolor floral painting!
For this tutorial, you’ll need:
- pointed round brush (small and large)
- watercolor paper
- watercolor paints
- paper towels
- water jars for rinsing
Techniques & Demonstration
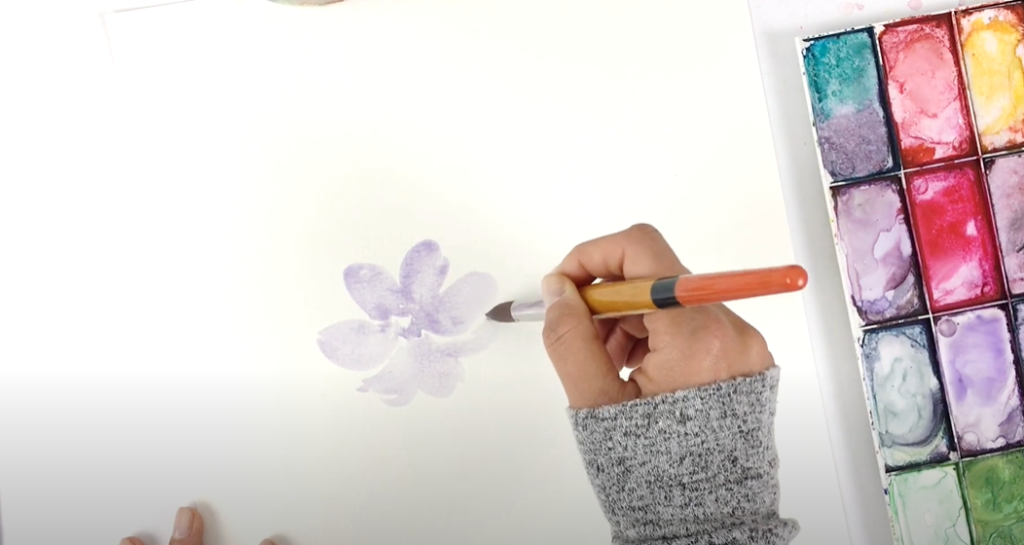
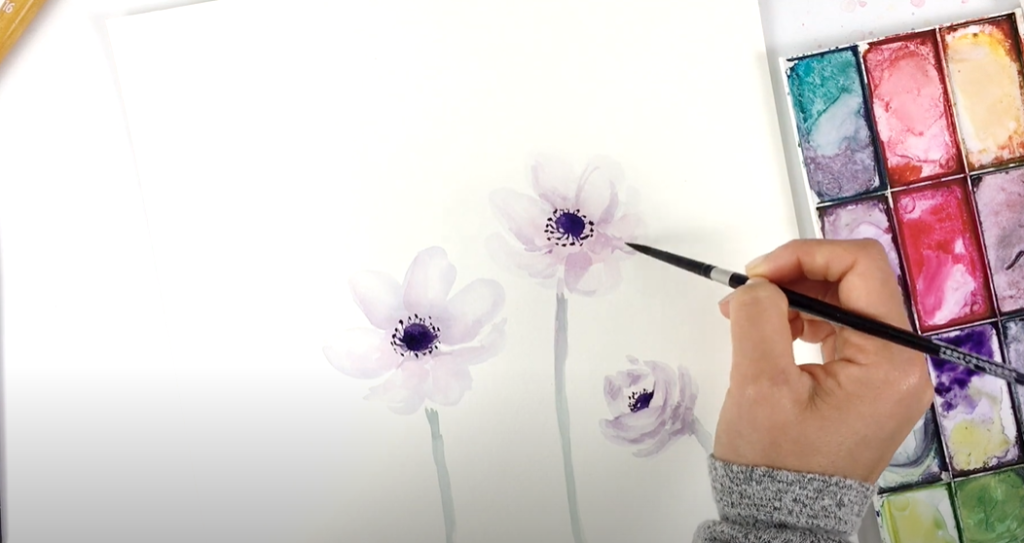
Starting with a light purple/lavender color and a large round brush, I’ll start by putting in the petals.

Because these petals are very light, almost white, I’m going to be picking up some of that extra color. I’m doing this by dabbing my brush on a paper towel, and using my brush like a sponge; picking up any extra paint & color. This blotting technique will give you that translucent and delicate look.
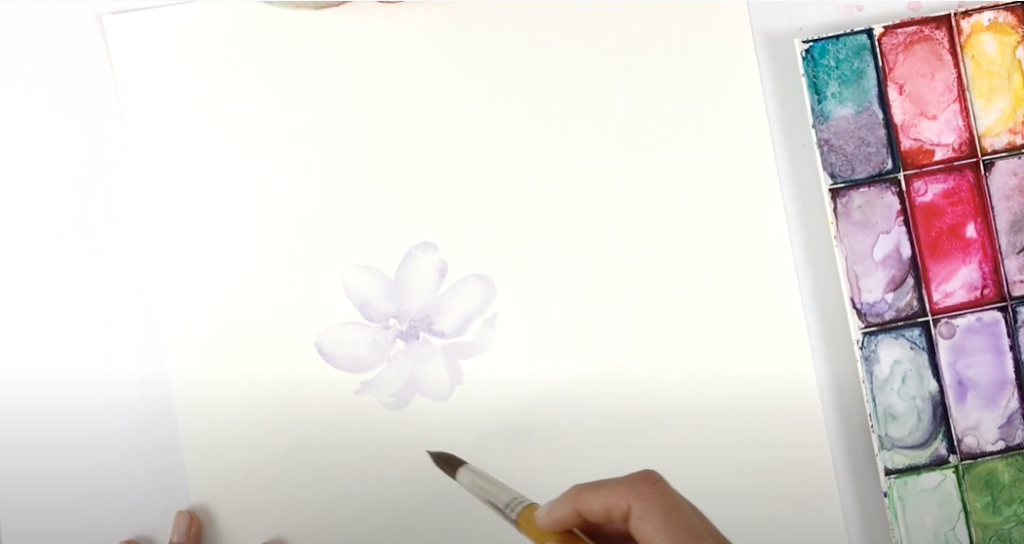
For the second flower I am repeating the process, starting with a small circle of color in the center and adding my petals with mostly water. Making your petals with mostly water will allow the color in the center to bleed out into the petals. After that, I am also dropping in some extra color in both flowers’ centers while the paint is still wet. This will make sure that added color also bleeds out and expand as it dries.

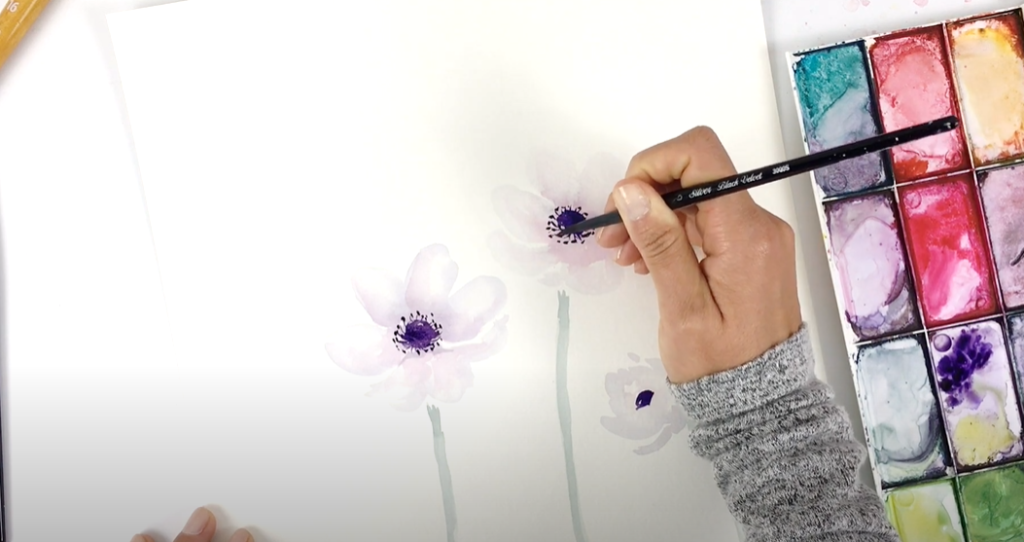
Next I’m mixing up some green with a touch of blue to put in the stems.

I’m also putting in a smaller flower with a side view in the bottom right.

Next I am doing a glazing technique to build up color. To do this, I made sure my first layer of paint was dry. Then, taking a lavender-pinkish color and a small brush, I am doing another translucent layer of color on top. Glazing just means to layer on top, so you can do any color you’d like to shift your flowers into a cooler or warmer palette. It’s a fun technique to practice!

Now I’m using a dark purple to add to the centers of the flower. For this color there is more paint to water than our previous translucent colors. For the smaller third flower, I am putting a little angle in that center area so it shows it’s a side view. Then around each center I am using the end of my brush to make small lines coming off the centers. Finally I am adding little dots on each end of those lines. For the smaller flower I am only doing those lines and dots along the top half since it’s a side view.
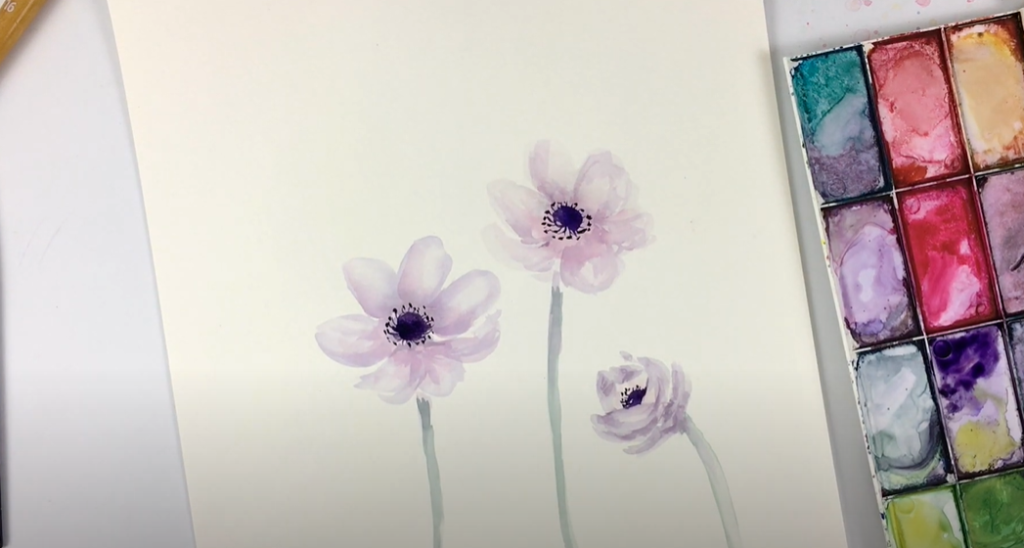
Now that the first layer is dry, we can go in with a second layer to build up shadows and add more definition to the petals. Then you can rinse your brush and soften out any edges you’d like. When you’re building your shadows, just keep in mind your light source. So if your light is coming from the right, then your shadows will be on the left, and vice versa.
I like to drop in the shadow lines first, give my brush a rinse, and then blend out some of those edges. This makes it so some are soft and some have a clear line, so there’s a mixture. It’s all these little details that will pull the final piece together. They might be really subtle, but they make a huge difference!
Thank you so much for joining me today! I hope you had so much fun painting. If you recreate this, please tag me on Instagram and/or Facebook so I can see your work!
Want even more watercolor tutorials?
Join my FREE Watercolor Florals Challenge! In this challenge, you’ll receive new tutorials for each season, and get access to our private Facebook community group. There you can connect with other creatives, ask questions, and get feedback on your work!


Watercolor Anemone Tutorial
VIEW THE COMMENTS